
After my Ask The Desk post about sheening inks, I’ve had many questions about how to make ink ring swatches. I first saw these in a lot of the swatches from Asian pen enthusiasts and I wracked my brain trying to figure out how they did it. I made a mess of many pages of my notebooks while I worked it out. It’s actually really easy to do.

Most ink bottles develop a bit of ink on the lip of the bottle once they’ve been opened. By pressing this ring of ink on paper, you can get a quick sample of the color without having a cotton swab or paint brush handy. This can be done on a Col-o-ring or Col-o-dex card or right into your notebook.
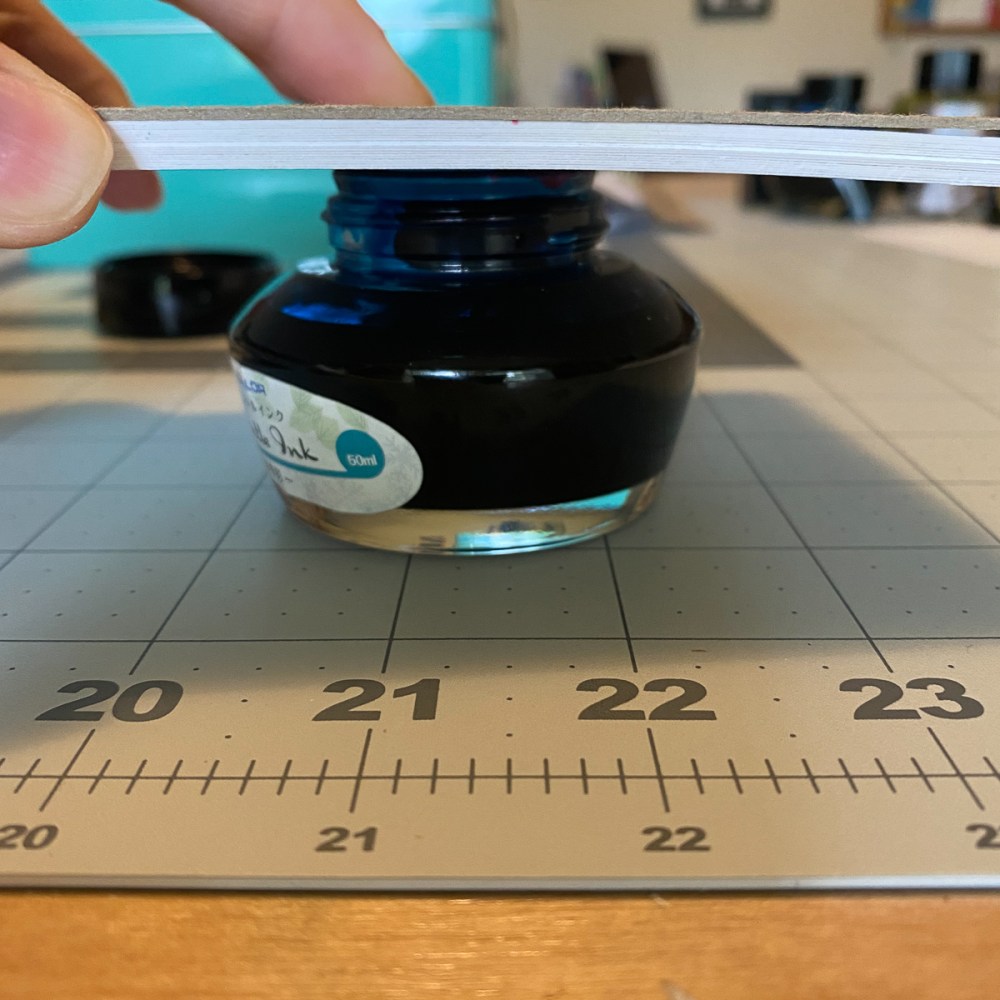
For this demo, I used my Col-o-ring OVERSIZE and pressed it down on the top of a bottle of Sailor Jentle Yamadori.

The ring looked like this. Then with a dip pen or another pen, I can add the name and color of the ink to inventory it.

In this case, I used a vintage Mabie Todd dip pen. Voila!
In a notebook, the same page can be used to swatch several inks in an interesting layout.

Here is another bottle. This time, a small Monteverde California Teal bottle. Can you see the ink on the lip of the bottle?

I flipped the paper and tapped it on to the bottle. If you are trying this for the first time, it may be easier to do with a Col-o-ring card or some index cards since it will be easier to aim and get your process down before trying it with a 300+ page Tomoe River notebook.

So, here’s the results of my page with two inks sampled. Let’s keep going.

The next bottle is Pen BBS No. 224. There’s some ink around the lip. If, for some reason, you have a bottle without any ink around the lip. Put the lid back on and screw it down, then unscrew it a half turn and turn it upside down. I recommend doing it over your sink, just in case it leaks at all. Then turn it right side and unscrew it and see if there’s some ink on the lip. If not, try the half turn/upside down trick again.

With two rings on my page already, I needed to look carefully to aim my ring artistically.

It turned out okay.

The only true challenge is sample vials. Ink does not accumulate on the lip of plastic, sample vials like it does on glass vials.

The only way to get a good amount of ink on to the paper is to tip the vial on to the paper which can be messy if the vial is not in contact with the paper entirely and leaks. So…. did I cover everything?
Great post. Most helpful. Now if I just wait for my morning coffee to wear off …
i love this idea… thanks!
I love ink rings! Quite fun! Thanks for the great post.
Thank you! I’ve been trying to wrap my head around this. Time for some pretty circles!
Thank you. Great idea!
Thank you thank you thank you for this tutorial! ♥ ♥ ♥ I loved it!
(… eyes collection of ink samples and ink bottles furtively …)
Ohhhhh baby. I have a new hobby within a hobby. Thanks a lot. I think.
What a great suggestion and a fun one too. I just swatched 6 glimmery inks. The vials had to be gently tipped back and forth the get the particles off the bottom. Wasted all that ink around the tops since I wiped the edge before I put my dip pen in the vial. I could have made some cool rings instead. I will definitely give this a try next time.
This makes me feel better about not having gotten around to swatching in my Col-o-ring, yet 🙂
I always thought the ink ring on the top of the container was there to stain my hands and prove that I am a fountain pen lover. I had no idea I could put that ink to good use – this is a fantastic suggestion!
This is genius!
For ink samples, I just paint ink on the ream of the top with paint brush than apply to paper with a twist.
Wow! I want to make a million of them!
GREAT IDEA ANA!!!